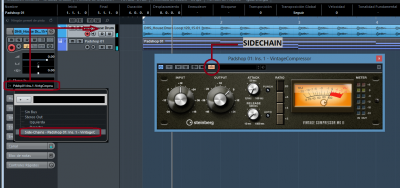
Ok, he seguido el tutorial este con el Vintage compressor" de cubase:
Lo que he hecho, en la pista de solo (la que quiero comprimir, parece contradictorio pero el solo se come la percusion) he insertado el vintage compressor de cubase dandole un imput importante para notar la compresion, y he activado el boton sidechain que trae el compresor..
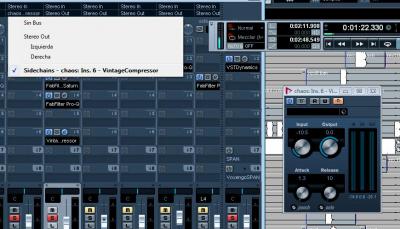
Me he ido a la pista percusiva (el disparador) y he seleccionado en inserciones el sidechain - vintage compresor..
Que pasa? pues que el compresor sigue funcionando pero no es disparado por la pista percusiva incluso dandole atacks y realease muy bajos.
Que hago mal?
Alguien escribió:
First, import or record some audio on two separate tracks in Cubase — use a dialogue recording on one (make sure there are some suitably long pauses), and any music track on the other. Now insert Cubase's Compressor plug-in on the music track and set it so that you can easily hear that it is doing something to the sound. If you make sure there's plenty of gain reduction, for example, the effect will be clearly audible — something like -15 to -20dB should do nicely. You can leave the attack and release settings for now, as we'll get on to them later.
All compressors are triggered by a side-chain signal, but by default this is normally the same as the input signal, so next we need to tell the compressor that we're going to use the dialogue track, rather than the music one, as Compressor's side-chain. To do this, you must activate Compressor's external side-chain by clicking on the side-chain icon at the top of the plug-in. You can find this at the top of the plug-in's GUI, just to the right of the 'R' and 'W' automation buttons (as shown in the screenshot at the bottom of the opposite page). Once you've done this, you'll find that if you play the track. Compressor is no longer having any effect (something that is reflected in its meters).
Now go to the vocal track and click on a send effect slot. Along with the usual options (Groups, FX channels and outputs) you'll see the compressor's side-chain input — and if you activate the external side-chain for more than one plug-in, they'll all appear in a 'Side-chain' sub-menu. Next, select the compressor's side-chain as the send destination and send a healthy portion of the vocal signal there — enough to exceed the compressor's threshold (it doesn't matter what it sounds like, as it won't be audible; it is simply the level information that we want to get from this signal).
If you now play back a loop that contains sections with and without vocals you should hear the compressor kicking in to squish the music during the vocals, and releasing to allow the levels to come back up when the vocal dips back beneath the compressor's threshold. It is worth having a play with the attack and release times of the compressor to hear for yourself what they do, but as a rule, the faster the attack, the quicker the sound will duck when the vocals start; the slower the release time, the longer it will take for the compressor to 'let go' of the music — so a long release should give you a gradual rise in the level of the music after the vocal stops.
While the example above uses dialogue to duck music, there are, of course, many more creative applications for ducking that can help us when mixing music (most of us aren't radio producers, after all), so let's move on to them.
http://www.soundonsound.com/sos/feb08/articles/cubasetech_0208.htm 


 ](*,)](https://statics.soniccdn.com/images/smilies/eusa_wall.gif)


