Hola,
Aquí os cuelgo mi último proyecto, que podría añadirse a la lista de proyectos DIY.
Después de mucho tiempo viendo proyestos de baterías electrónicas hechas con arduino y no encontrar ninguno que (a mí) me funcionasen bien, me puse manos a la obra y finalmente lo tengo terminado. (Gracias por su ayuda a Víctor y a Diego)
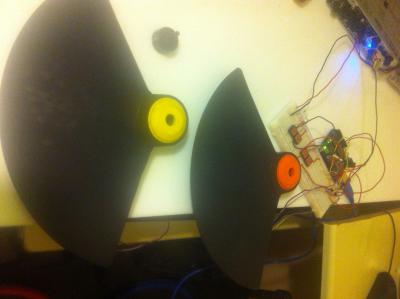
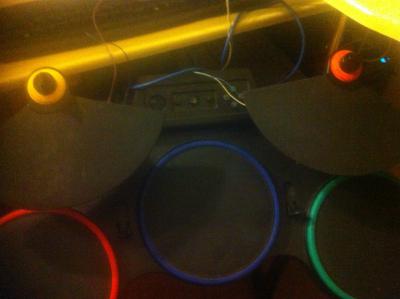
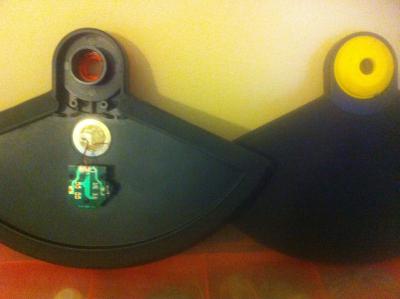
El bicho consiste en dos pads reciclados de una batería de PlayStation que alguien tiró a la basura. La batería en sí no funcionaba, pero yo he reutilizado los pads que tiene a modo de platos, los he conectado a un arduino y p'alante!
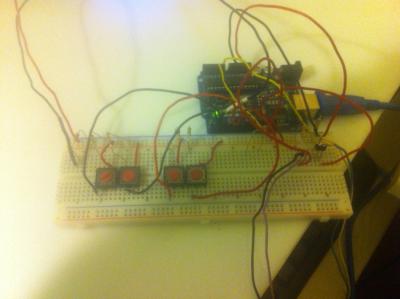
Lo que me parece más interesante de este proyecto es que le he incluido unos botones con el que se puede seleccionar la nota que envía el Pad, y tiene dos botones por pad (uno para subir de nota y otro para bajar) que nos permiten seleccionar independientemente qué sonidos queremos usar en cada uno. así se convierte en algo realmente útil. En mi caso, estos pads se acoplarán a la batería de mi grupo y el batera podrá disparar diferentes efectos.
Mis conocimientos de electrónica y de programación son escasos, así que si alguien con más conocimiento ve algo que no debería ser así agradecería su opinión
Ingredientes:
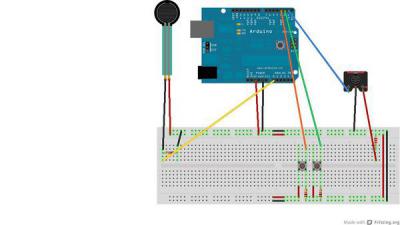
Arduino Duemilanove
Piezos x2 (o róbale la batería de la PlayStation a tu hermano pequeño)
pushbuttons x4
Resistencias de 220 Ohms x1 (para el cable MIDI)
Resistencias de 10k x6
Protoboard x1
Conector MIDI x1
cable
(Arduíno incluido saldría por unos 35€)
Código
/*
PADUINO based on MIDI note player (by Tom Igoe)
This sketch shows how to use two piezos to send Midi notes. It's able to change the note of wich one, using pushbuttons.
The circuit:
* digital pin 1 connected to MIDI jack pin 5
* MIDI jack pin 2 connected to ground
* MIDI jack pin 4 connected to +5V through 220-ohm resistor
Attach a MIDI cable to the jack, then to a MIDI synth, and play music.
PiezoA connected to analog pin 0
PiezoB connected to analog pin 1
buttonmasA connected to digital pin2
buttonmenosA connected to digital pin3
buttonmasB connected to digital pin4
buttonmenosB connected to digital pin5
created 13 Jun 2006
modified 2 Jul 2009
modified 21 may 2012 by The man with the x-ray eyes
This example code is in the public domain.
https://elcastizo-vpn/wiki/index.php/Incluir_dos_botones_de_selecci%C3%B3n_de_sonido_al_piezo_MIDI
*/
#define PIEZOATHRESHOLD 14//change this value
#define PIEZOBTHRESHOLD 14
#define piezoAPin 0
#define piezoBPin 1
// this constant won't change:
const int buttonmasAPin = 2;
const int buttonmenosAPin = 3;// the pin that the pushbutton is attached to
const int buttonmasBPin = 4;
const int buttonmenosBPin = 5;// the pin that the pushbutton is attached to
const int ledPin = 13; // the pin that the LED is attached to
// Variables will change:
int noteA = 69; //MIDI note 69=A (440hz)
int noteB = 74;
int buttonmasAState = 0; // current state of the button
int lastButtonmasAState = 0; // previous state of the button
/// int buttonmenosPushCounter = 0; // counter for the number of button presses
int buttonmenosAState = 0; // current state of the button
int lastButtonmenosAState = 0; // previous state of the button
int buttonmasBState = 0; // current state of the button
int lastButtonmasBState = 0; // previous state of the button
/// int buttonmenosPushCounter = 0; // counter for the number of button presses
int buttonmenosBState = 0; // current state of the button
int lastButtonmenosBState = 0; // previous state of the button
int valA;
int valB;
void setup() {
// initialize the button pin as a input:
pinMode(buttonmasAPin, INPUT);
pinMode(buttonmenosAPin, INPUT);
pinMode(buttonmasBPin, INPUT);
pinMode(buttonmenosBPin, INPUT);
// initialize the LED as an output:
pinMode(ledPin, OUTPUT);
// initialize serial communication:
// Set MIDI baud rate:
Serial.begin(31250);
}
void loop() {
valA = analogRead(piezoAPin);
if( valA >= PIEZOATHRESHOLD ) {
while(analogRead(piezoAPin) >= PIEZOATHRESHOLD/3) {
}
noteOn(0x90,noteA,0x45);
// delay(0);
noteOn(0x90,noteA,0x40);
}
valB = analogRead(piezoBPin);
if( valB >= PIEZOBTHRESHOLD ) {
while(analogRead(piezoBPin) >= PIEZOBTHRESHOLD/3) {
}
noteOn(0x90,noteB,0x45);
// delay(0);
noteOn(0x90,noteB,0x40);//0x00 = note off, but 0x40= no velocity
}
buttonmasAState = digitalRead(buttonmasAPin);
buttonmenosAState = digitalRead(buttonmenosAPin);
buttonmasBState = digitalRead(buttonmasBPin);
buttonmenosBState = digitalRead(buttonmenosBPin);
// compare the buttonState to its previous state
if (buttonmasAState != lastButtonmasAState) {
// if the state has changed, increment the counter
if (buttonmasAState == HIGH) {
// if the current state is HIGH then the button
// wend from off to on:
if (noteA <127)
{ noteA++; }
else { noteA = 0; }
// compare the buttonState to its previous state
}
}
if (buttonmenosAState != lastButtonmenosAState) {
// if the state has changed, increment the counter
if (buttonmenosAState == HIGH) {
// if the current state is HIGH then the button
// wend from off to on:
if (noteA > 0)
{ noteA--; }
else { noteA = 127; }
}
// compare the buttonState to its previous state
// if the current state is LOW then the button wend from on to off:
}
// save the current state as the last state,
//for next time through the loop
lastButtonmasAState = buttonmasAState;
lastButtonmenosAState = buttonmenosAState;
if (buttonmasBState != lastButtonmasBState) {
if (buttonmasBState == HIGH) {
if (noteB <127)
{ noteB++; }
else { noteB = 0; }
}
}
if (buttonmenosBState != lastButtonmenosBState) {
if (buttonmenosBState == HIGH) {
if (noteB > 0)
{ noteB--; }
else { noteB = 127; }
}
}
// save the current state as the last state,
//for next time through the loop
lastButtonmasBState = buttonmasBState;
lastButtonmenosBState = buttonmenosBState;
}
// plays a MIDI note. Doesn't check to see that
// cmd is greater than 127, or that data values are less than 127:
void noteOn(int cmd, int pitch, int velocity) {
Serial.write(byte (cmd));
Serial.write(byte (pitch));
Serial.write(byte (velocity));
}
Bueno, creo que eso es todo, si alguien se anima a hacerlo y le surge cualquier duda, ya sabéis donde me tenéis
saludos
The Man


